Wednesday, July 6, 2011

Strawberry Picking and Cinnamon Strawberry Muffins { Recipe }


Last week it was finally strawberry season here in Illinois!  My husband was out of town for the week on a fishing trip with his dad, so the girls and I decided to head to our local strawberry farm to pick some fresh berries.


At the farm they give each child their own small basket and then they give each adult a larger basket.  It's not a fancy place, but it was just the perfect place for this mama and two little ladies.


The girls were very busy picking their berries.  Savannah stayed very focused and picked a ton.  Matilda, however, eventually decided it was best just to eat all the berries she was picking that way her basket would be empty and she could wear it as a hat.


We ended up with a huge basket of berries.  Both the girls started just filling up mama's basket and we filled it to the brim!


Once we had all our berries picked, it was time to head home and figure out what to do with all these gorgeous little red berries.


Cinnamon Strawberry Muffins
Makes 18-24 muffins

So we had picked all of these berries and I knew we needed to make something with them because, especially with my husband being away, there was no way we were going to eat this whole basket.  I thought about strawberry scones and strawberry cake, but settled on strawberry muffins.  I added some cinnamon to make these a little different than your average muffin and oh.my.goodness - they are delicious.

If you have any berries lying around, give this recipe a try.  It's heavy on the cinnamon and heavy on the sugar - two of my favorite things.  And the tops get super-crunchy and delicious.  You're going to love it!

Ingredients:
1 lb. fresh strawberries, hulled and cut in half
3 cups flour
1 tablespoon baking powder
1/2 teaspoon baking soda
1 1/2 tablespoons cinnamon
1 1/4 cups sugar
2 sticks butter, melted
1 1/4 cup milk
2 eggs

Directions:
Preheat your oven to 375 degrees.


Prep your strawberries by taking the tops off and cutting them in half.  Some of our berries were pretty tiny so I just left those whole.

Combine all dry ingredients in a bowl, except for the sugar.  In a separate bowl, combine all wet ingredients.  Add wet ingredients to dry ingredients and combine.  Toss your strawberries with the sugar.


Add strawberry/sugar mixture to the muffin mixture and fold in gently to combine.


Spray two muffin pans with non-stick cooking spray (you could also use muffin liners, if you prefer).  Use a 1/4 cup measuring cup and fill each muffin tin just about to the top.

Place in oven and bake for 25 minutes or until the tops are golden brown and a toothpick inserted into the muffins comes out clean.


Allow muffins to cool and then remove from pan.  If you do not plan to eat your muffins that day, I suggest freezing them.  Strawberries tend to make baked goods kind of soggy if they sit too long.

Place them in a freezer bag and lay them flat in your freezer for the initial freeze.  You can pull the muffins out one at a time when you are ready to eat them, microwave for about 45 seconds and they literally taste like you just pulled them out of the oven.  This is also a great technique if you have guests coming for a visit and you want to bake prior to their arrival or for a quick breakfast before work or school.


We only have one of these muffins left and looking at this picture is making me think, I need to walk immediately into the kitchen and pull it out of the freezer.  YUM!

Link Party No. 60!

Several months ago, I found these frames for $3.00 a piece at a thrift store... I loved the details on the frame, and wanted to give them new life. (Looks like the previous owner even attempted to paint one of them).


A little bit of a spray paint and cork board, they look much better.


Originally I wanted to use them as my design board, but now I am not so sure.

I was playing around to see how these frames would look with some jewelries, and I l love the look also!


Should I use them as a jewelry display board or as a design board (yea, I need to organize my ideas too)? If you were me, what would you do?

Ok, it is time for the link party! Please link up your fabulous projects and share with us!

1. Please post something YOU made. It doesn't matter if it is crochet, quilt, clothing, anything would be fine. I want to see it! If you use someone's idea or patterns please give them the rightful credit.

2. Link to your specific post, that way it is easier for everybody to find and read it.

3. Please grab the "Tea Rose Home" grab button, and link back from your post. If you can mention the party in your post or place the button on your side bar, that would be great! I want more people to have a chance to come and show off their creation.


Tuesday, July 5, 2011

A Full House for the Holiday


My brother and his wonderful family were out this past holiday week and we had so much fun! One of our favorite activities was watching movies on the barn. The old Victorian couch was my Great Grandmother's. It used to be in our play room when we were kids (also my Dad's childhood room). 

We hauled it out of storage (from the barn) for movie viewing under the stars. 

Here's part of the gang just before pancake breakfast - my nephew Nathan, my nieces Lauren and Katie, and my Mom with Graham. My sister-in-law Marna and I (with baby Margaret) are reflected in the mirror. 


New Blog Sponsor: Tie Dye Diva Sewing Patterns and Giveaway


I'm so excited to introduce our newest blog sponsor here on The Cottage Home -


I know many of you love, love, love downloadable PDF sewing patterns and Tie Dye Diva is loaded with just that! They have downloadable PDF sewing patterns for diaper covers, girls and baby dress patterns, ruffled rompers & more.   These are sewing patterns that are emailed to you and you can print out on your home computer.  Patterns are typically sent within 8 hours, if not sooner, so you can get sewing as soon as you find a design that you want to try!

Tie Dye Diva Patterns are very user-friendly for even the newest sewer.  You can save up to 25% by purchasing a bundle of three or more patterns which makes these sewing patterns some of the most affordable on the market.

Here are some of my personal favorite patterns:


And for the boys.........


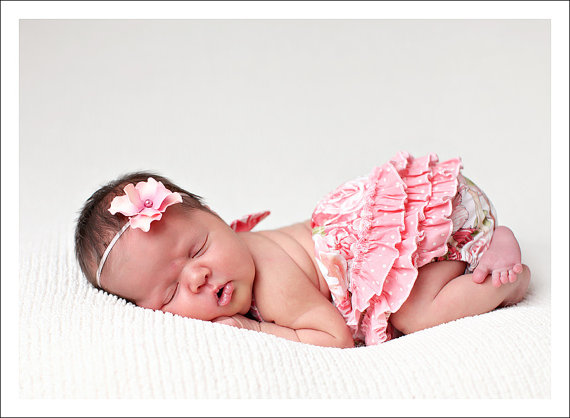
So those are just some of my favorites, now it's your turn to head over to Tie Dye Diva's etsy shop and let me know what are your favorites.  I just love anything with ruffles on the booty so that Ruffle Back Romper is calling my name!

Today Tie Dye Diva is giving away two PDF sewing patterns to two lucky The Cottage Home blog readers.  

Here's how to enter..........Please leave a separate comment for each entry. You can enter up to four times. Do one or all of the following:
1) Visit Tie Dye Diva's etsy shop and choose your favorite pattern (click HERE to do so).
2) Become a fan of the Tie Dye Diva on Facebook (click HERE to do so).
3) Become an official follower of The Cottage Home blog.
4) Become a fan of The Cottage Mama on Facebook (click HERE to do so).

Giveaway will be open through Friday, July 8, 2011 at midnight (CST).

If you are interested in becoming a sponsor of The Cottage Home blog, please email me at thecottagemama[at]gmail[dot]com for rates and more information.


VINTAGE SEA SELLS


Monday, July 4, 2011

From Grandma with Love.....Cowgirl Princess Quilts and Ruffle Pillows

I love my mom.  I know I've told you all that before, but she really is the best!  So thoughtful, kind, understanding, a good listener and I could go on and on, but I know she reads the blog and I don't want her to get a big head or anything.

She has really been taking a lot of time lately sewing some fun things for my girls and I just had to share her most recent creation with you.


My mom lives in Texas and she said that when she found this Cowgirl Princess fabric she knew she MUST make these quilts for the girls.  


Isn't that fabric just adorable?


Mom made both Savannah and Matilda each a Cowgirl Princess quilt and a matching ruffle pillows.  I love the piecing and framing she did around the border of the quilt.  It really makes the fun cowgirl princess fabric stand out in the middle.


My mom quilted the center fabric with what she calls her "lasso" technique.  She used her free motion quilting foot to make the stitching look like little lassos.  She said she thought something was missing when she finished the quilts so she went back around the center panel with this decorative scallop stitch.  Genius!  I've used this same stitch on the edging of dresses, but would never have thought to use it on a quilt.


The pillows are adorable and are perfect size for little toddlers.  Because she made the pillowcases smaller, she also made an interior pillow to fit inside each case.  My daughter, Matilda, refuses to sleep with any other pillow right now.  This is the one she loves.


I love handmade gifts and I love that my mom takes so much time to make fun things for my girls.  And honestly, even though my little ladies are young, they really appreciate handmade.  They love getting things from Grandma and tell anyone who will listen all about the fun things that have been made for them.

Thanks for the adorable Cowgirl Princess quilts and pillow sets for the girls.  They love them and we love you!  Yeeeeeeehaaaaaaaaw!!!

PS:  Since I took these pictures, we have since received the most adorable cherry picnic dresses from my mom - I can't wait to share those with you next!

HAPPY INTERDEPENDENCE DAY

(Underwater fireworks. Credit: talentfrei79 via Flickr.)