Showing posts with label tutorial. Show all posts
Monday, May 7, 2012
Tutorial/ Crate & Barrel Inspired Painted Pillow
I received a new catalog from Crate & Barrel in the mail, there were so many eye candies in there, but I especially LOVED this pillow...
I decided to make my version of Crate & Barrel’s inspired pillow using what I had. I will show you how I did it.
{You will need}
1------16" x 16" Pillow form
2------18"x 18" Fabrics (I trimmed them down after I painted them. I used linen instead of canvas)
1------14"x 14" zipper
Fabric Paint 1 - 2 bottles
Fabric Medium
Roller
Freezer Paper
Craft Punches
{How to}
* Fabric Paint
1. Lay one 18"x 18" fabric on a flat surface and Find the center. I just used my 10 1/2" dinner plate to draw a circle. Make sure to draw really lightly, because some of the areas I drew on were too dark, and after I painted once it still showed through.
2. I used three different types of flower punches. Cut lots of flower pieces out of freezer paper.
3. Place them in the circle you drew. Press them with a hot iron without steam.
4. Paint the fabric. I used Martha Stewart multi-purpose paint mixed with fabric medium. Paint the other fabric too. Let it dry for 24 to 48 hours. After they are completely dry, iron to set the color.
* Assemble the Pillow
1. Lay both fabrics together right sides together on the cutting mat. Trim off the excess from all sides to make it to 17" x 17" squares. Then treat one side of the edge from both fabrics to prevent fraying.
2. Lay the zipper on one side of the fabric, and mark about 2 1/2" in from both sides. Then sew both ends, do not forget to do backstitch so they don't fall apart later.
3. Then switch your stitch length to your largest setting and sew the part in between the 2 1/2" sewed part (can you see the big stitches and small stitches?)
4. Open the seam, and press with the iron. Lay the zipper front side down. Pin it to the seam.
5. Switch the stitch length back to normal, and also swap to the zipper foot and sew the zipper on.
Front...
Unpick the basting stitches, so you can use the zipper...
6. Open the zipper, and put the fabrics right sides together again. Pin them well.
7. Sew the three sides using 1/2" seam.
8. You can choose your preferred method to finish the edges, but I thought that the fabric was pretty stiff from paint, I decided to try pinking scissors. Cut off the corners for a prettier finish.
9. Turn the pillow case inside out, press the edges with the iron.
Time to enjoy!!
I love love how it turned out, the fabric is a little bit stiffer with paint than I thought it would be, but that's OK. This is meant to be a "decorative" pillow. :) I enjoyed the process so much so that I am thinking about making more.
Saturday, December 17, 2011
Tutorial~ She Carries Flowers (key holder)
I thought I posted this tutorial on my blog, but now I don't remember if I did or not. I have been getting requests for a tutorial from the people who saw the pictures of the finished key holder on line (probably Sew Mama Sew or Pinterest) but couldn't find the tutorial for it. So, I am sorry if you are tired of seeing this, but if you have been trying to find the tutorial, here you go. :)
I will also list this on my side bar along with my other tutorials.
I have been obsessed with folded fabric flowers and wool flowers lately. I have created a bag and refashioned one of my old cardigans by using the flowers and I LOVE how they turned out.
The love of those flowers didn't end there and I still have a bunch of ideas for them. I am sharing a tutorial for a key holder today and of course it is decorated by fabric folded flower... The key holder is easy to make and you can make a whole bunch of them inexpensively. It is a perfect stocking stuffer, or for a gift exchange with the girlfriends you hang out with.
I hope you will enjoy the tutorial!

{You will need} --- For one key holder

1 --- 2 1/2" x 6 1/2" fabric
1 --- 2 1/2" x 2 1/2" fusible fleece
Matching thread
1 Ring
6 --- 1 1/4" x 1 1/4" fabric squares for making a flower
Buttons and beads to decorate
{How to}
1. Fuse the fusible fleece to the fabric. Follow the instructions that came with the fusible fleece. Fold the fabric at the edge of the fusible fleece. Measure and mark the fleece, according to the picture. If you are making more than one, it will be quicker to make a pattern with a piece of paper and trace it.

2. Sew inside of the line, using 1/4" seam. Cut off the excess and cut small triangles around the corners for a nicer finish.


3. Turn the fabric inside out. It is easier to use scissors or a chopstick to push the fabric out. Fold the top in thirds, and press the whole thing with an iron. Stitch around the edge with 1/8" seam.

4. Fold 1/4" from the top, and put a ring on the fabric and fold the fabric over the ring and sew the ring into the key holder.

5. Sew fabric folded flower, beads, and buttons to the key holder. I did it so that the stitches are not showing on the other side. You can see what I did to make the flower here .

I enjoyed coming up with combinations of fabrics, buttons and beads. It is so funny that a slight change can give each key holder a whole new look.


I hope you have enjoyed my tutorial today. Happy sewing!
I will also list this on my side bar along with my other tutorials.
I have been obsessed with folded fabric flowers and wool flowers lately. I have created a bag and refashioned one of my old cardigans by using the flowers and I LOVE how they turned out.
The love of those flowers didn't end there and I still have a bunch of ideas for them. I am sharing a tutorial for a key holder today and of course it is decorated by fabric folded flower... The key holder is easy to make and you can make a whole bunch of them inexpensively. It is a perfect stocking stuffer, or for a gift exchange with the girlfriends you hang out with.
I hope you will enjoy the tutorial!
{You will need} --- For one key holder
1 --- 2 1/2" x 6 1/2" fabric
1 --- 2 1/2" x 2 1/2" fusible fleece
Matching thread
1 Ring
6 --- 1 1/4" x 1 1/4" fabric squares for making a flower
Buttons and beads to decorate
{How to}
1. Fuse the fusible fleece to the fabric. Follow the instructions that came with the fusible fleece. Fold the fabric at the edge of the fusible fleece. Measure and mark the fleece, according to the picture. If you are making more than one, it will be quicker to make a pattern with a piece of paper and trace it.
2. Sew inside of the line, using 1/4" seam. Cut off the excess and cut small triangles around the corners for a nicer finish.
3. Turn the fabric inside out. It is easier to use scissors or a chopstick to push the fabric out. Fold the top in thirds, and press the whole thing with an iron. Stitch around the edge with 1/8" seam.
4. Fold 1/4" from the top, and put a ring on the fabric and fold the fabric over the ring and sew the ring into the key holder.
5. Sew fabric folded flower, beads, and buttons to the key holder. I did it so that the stitches are not showing on the other side. You can see what I did to make the flower here .
I enjoyed coming up with combinations of fabrics, buttons and beads. It is so funny that a slight change can give each key holder a whole new look.
I hope you have enjoyed my tutorial today. Happy sewing!
Monday, October 31, 2011
Tutorial / T-shirt Pillow (just because I found an old t-shirt)
I have been going through my house on and off for the last several months. To get rid of things I usually have a system... There are three piles, such as "Donate", "Sell", "Throw away". Any other place in the house is not hard to do this except in Mr. TRH and my closet.
I have a weakness for fabrics, and there is no exception when I am trying to get rid of some clothes. Even though an item hasn't been worn for such a long time, I start to think "uh, I can use this to make this" or "ah, I bet if I do this and this I can still wear it".
So, this is one of those projects that I just had to try and see. :)
I found this old t-shirt on Mr.TRH’s side of closet. It was in good condition, but he hadn’t worn it AT ALL for several years.
1. First cut it apart.
2. Cut 2 -- 15" X 22" rectangles for the pillow, and many 1" wide strips. If the t-shirt you have is smaller, you can cut smaller rectangles to make a smaller pillow.
3. On one of the rectangles, you can start "drawing". When you stretch the strips, they will curl up; I think this gives an interesting effect to the pillow. I didn't have any plans whatsoever, but I just eye balled the middle, and pinned the first strip and started to sew.
Keep drawing with strips...
4. After I did lots of "drawing" with strips, I made some ruffle strips to fill in some spaces. To make ruffles, sew in the middle of the strips with large stitches and pull one of the threads. Gather the fabric to make ruffles.
5. Put the front and back fabrics right sides together. Pin them and sew all around it with 1/4" seam. Make sure to leave 3" - 4" opening for turning.
7. Snip the corners for a neat finish.
8. Turn, press the edges with an iron. Stuff, slip stitch closed...and ta-da!
When the kids came home from school, Rachel noticed the pillow right away; the boys couldn’t care less about such minor details in life. I thought it was so funny to see the difference. Although, the pillow is loved by everyone, it is so soft and cuddly and perfect for a pillow fight. :)
Thursday, September 1, 2011
Tutorial / Sunkissed Tunic

A couple month ago, I found this boys t-shirt at Target in the kids section. I think it was $ 3.49. For some reason I could not take my eyes off of this shirt, and decided to take it home...
I will share how I made the shirt into a girl`s tunic. The shirt was size M (and that is for an 8 - 10 year old) and my daughter just turned 6 and she is slightly small for her age. If you want to make a bigger sized tunic, you obviously need a bigger t-shirt. I hope this will give you a general idea for the sizing.
{you will need}
a t-shirt
matching thread
buttons (I used 4 small buttons, but you can do 3 bigger size buttons too.)
Lace type elastic
{How to}
1. First, cut rib knit around the neck and both sleeves off.
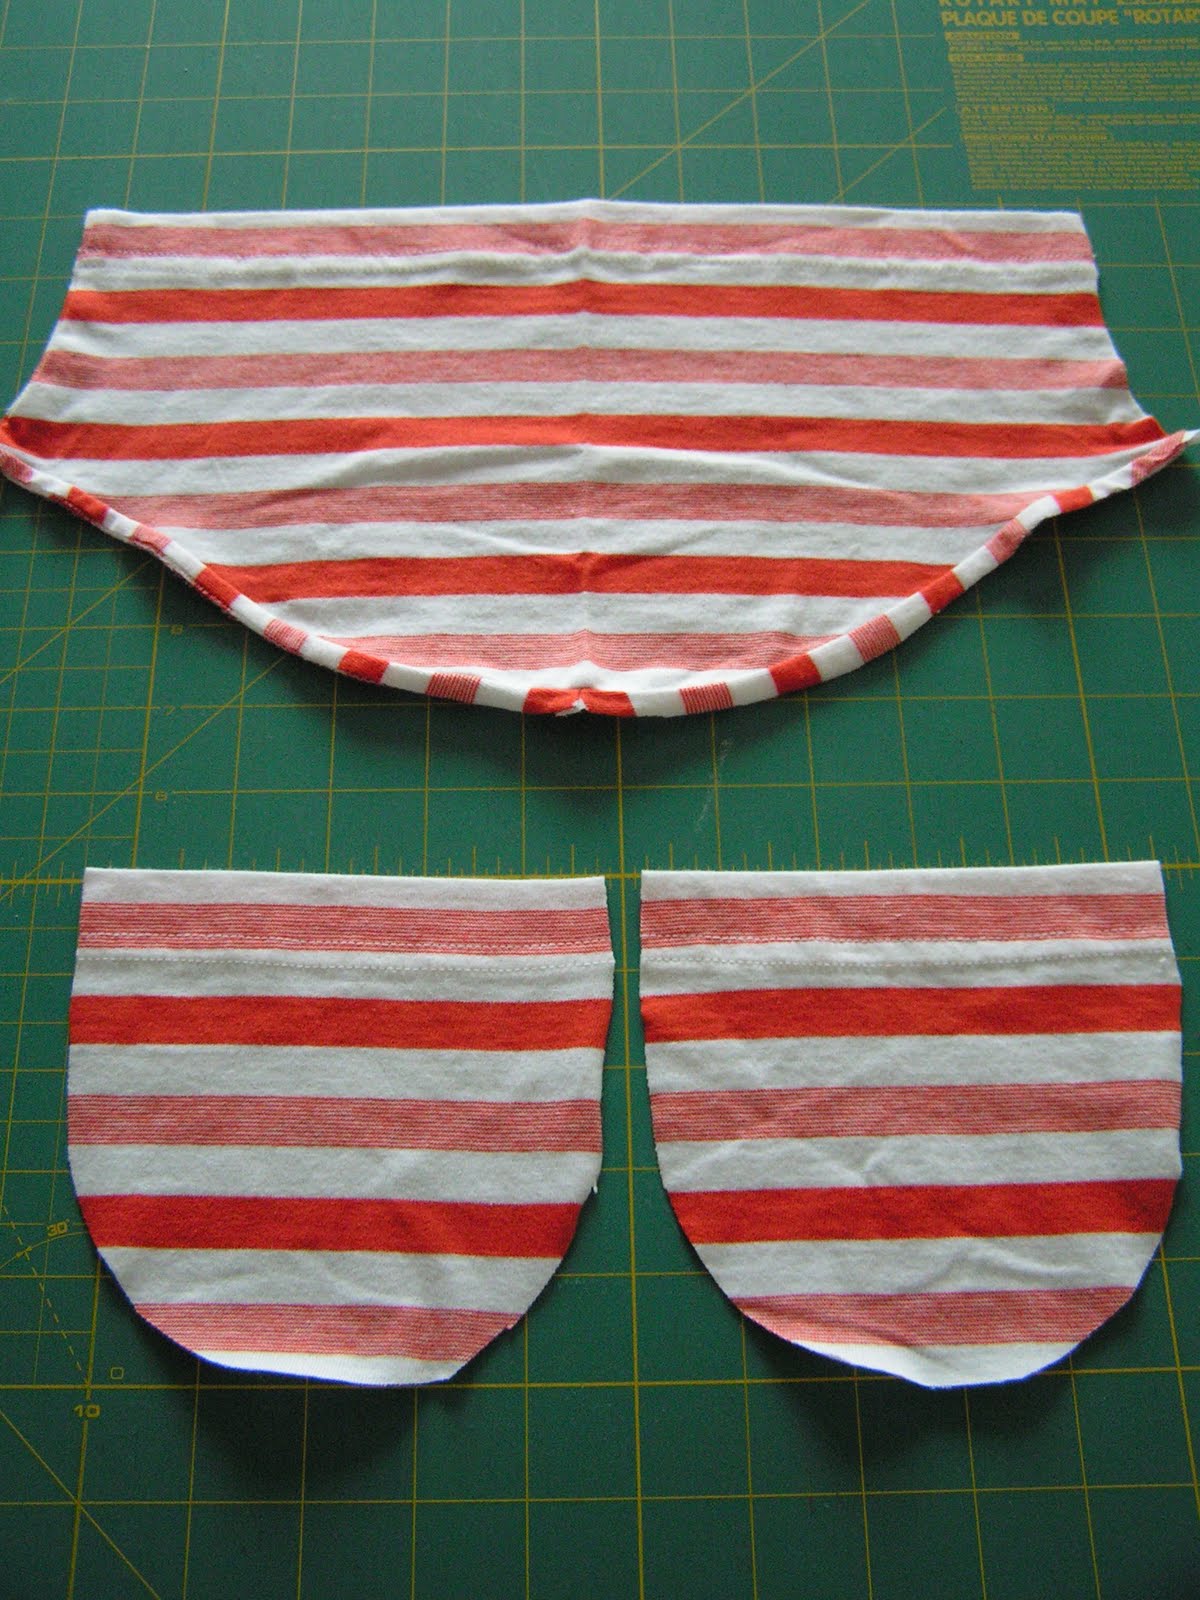
2. Cut open both sleeves at the seam and lay it flat. Out of one of the sleeves cut out two pockets. I made a template for the pocket out of a cereal box. Draw 4 1/2" X 5" square, when you cut, cut off the bottom corners to round it. Lay it on the sleeve, and add 1/4" seam and cut.
3. Look at the picture closely... from the tip of the shoulder to the marked point, it is 5". Draw a natural curve for the arm hole. From the marked point, draw a straight line to the bottom of the t-shirt. This will create an A-line on the sides.
4. Fold 1/4" seam towards the wrong side of the shirt and sew elastic on. With mine, I cut 2 - 8" elastic for the sleeves.
5. Sew elastic around the neck too. For the neck line I cut 17" elastic, but it is best to measure your child's head to decided on how long you will need.
6. To make the pocket, hand sew around the edge of the pocket with big stitches. Lay the template onto the fabric and pull the thread to gather the fabric. Press with iron. You will have nice curve for the bottom of the pocket.
7. Sew the sides of the shirt. Use your favorite method to treat the seams.
8. Pin the pockets on the shirt and sew. To decide on where to sew them it is best to let your child wear the tunic. That way it is easier to see where it is most convenient for her.
9. Cut up several 1" wide strips from the other sleeve to make ruffles for the front.
10. First, fold both ends and pin the 1" X 4 1/4" strip in the center of the shirt and sew.
11. To make ruffles use the largest stitch on your sewing machine and sew one edge of the strip and pull the thread. Use the pictures as a guide.
12.Pin them on both sides of the middle part and sew them on. As you can see, I used zigzag stitch to sew them on.
13. Add another layer to it using the same steps. I cut the bottom corners of the ruffles to create a more interesting look.
14. Sew buttons on. This was the fun but difficult part for me! I had several choices of buttons and I finally narrowed them down to these...
You want to see the final product?
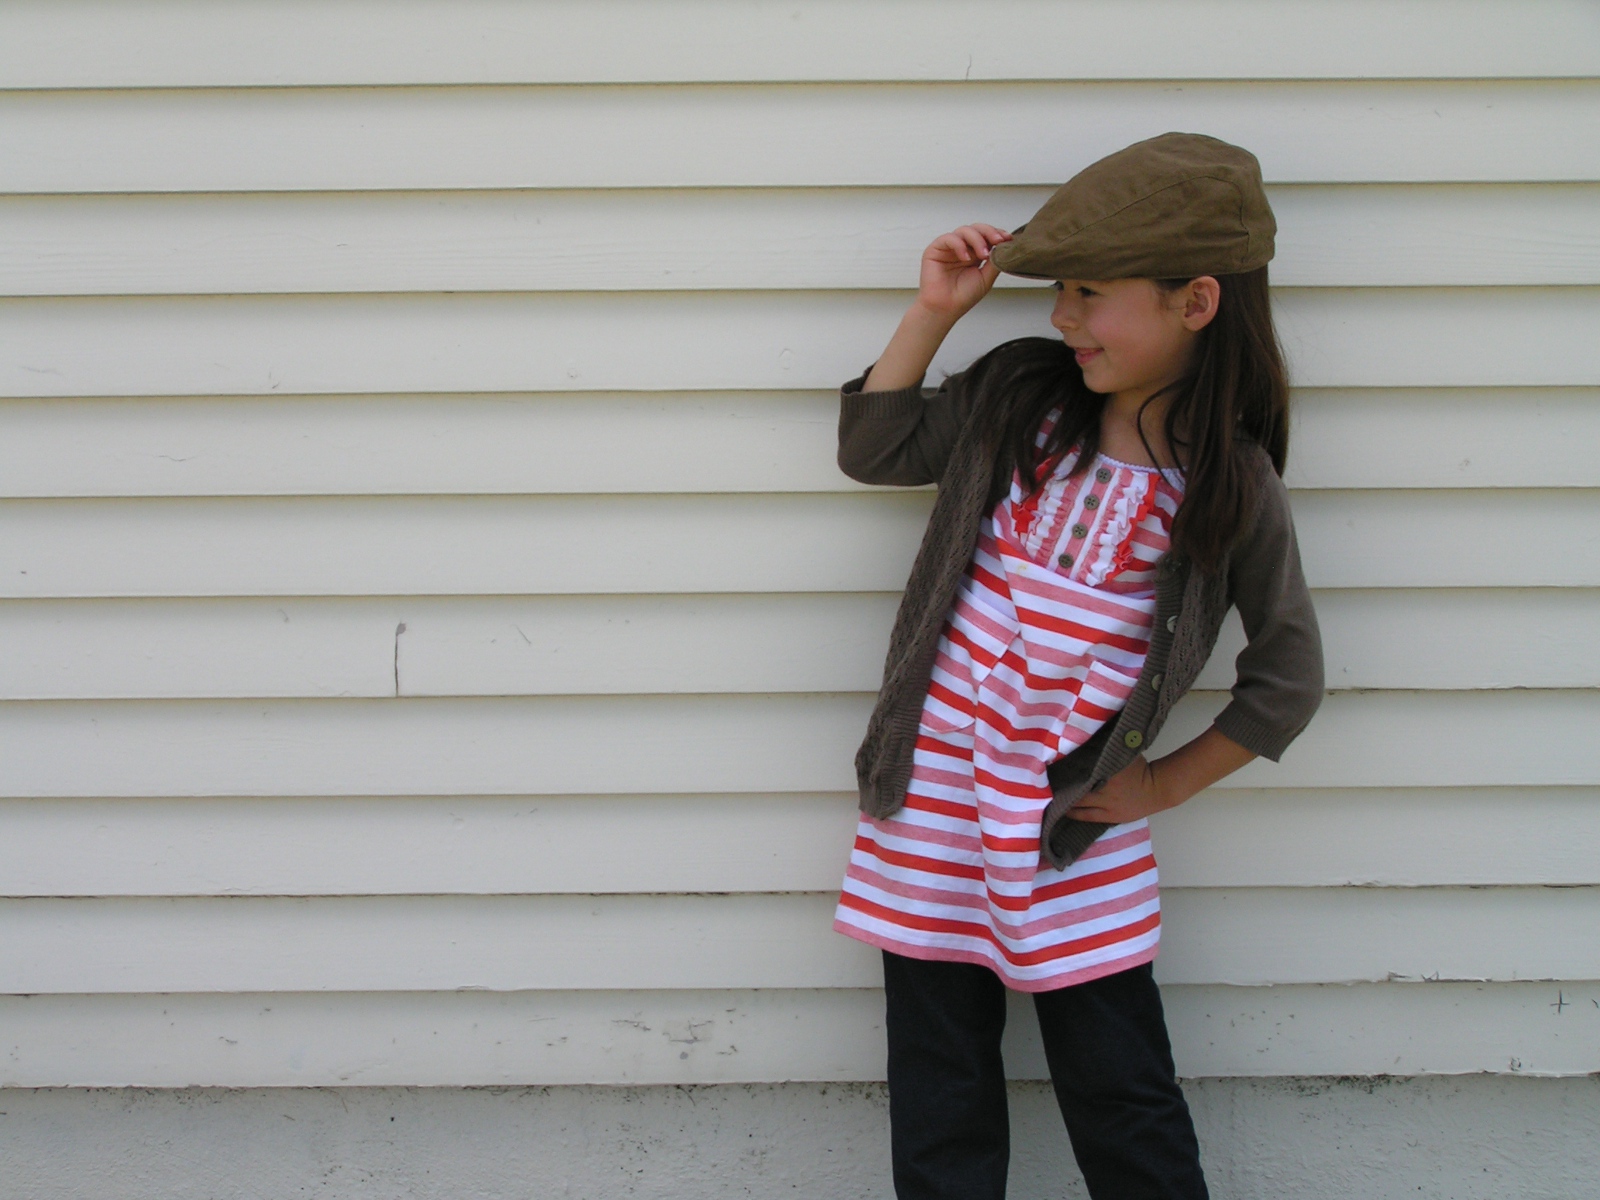
Rachel had such a fun time taking pictures (believe me it's not like that always, I do not force her to do it, but when she is in the mood, it is so fun!)
Since I make the tunic a little late in the season, I will share one of the outfits planned for the fall.
I took these pictures on different days, but again, she was on a roll! She loved her brother's hand me down hat, maybe that made her feel like she is a "Model". :)
She was laughing, and air guitaring...
For some reasons, "walking"...
Cool dude?
...then my favorites. She absolutely loves her new tunic, she already wore it several times. Yea!
The summer is ending, now is the perfect time to find cheap t-shirts at the sales rack. Enjoy!
Subscribe to:
Posts (Atom)