This is an easy afternoon project called the 'Fat Quarter Tote'. I fell in love with the fabric line, 'Seaside', by Riley Blake Designs the first time I saw it at quilt market back almost 9 months ago in Houston, TX. The colors, the prints, the nautical feel......awwww, swoon. I knew I had to use this line the minute it came out!
The Fat Quarter Tote is a fully lined medium-sized tote bag made from six fat quarters (with a little bit of interfacing). Once you know how this sweet little bag goes together, you will be able to whip up several of them in no time. Let's get started.......
Fat Quarter Tote Tutorial
by Lindsay Wilkes from The Cottage Mama for Riley Blake Designs
Materials:
2 Fat Quarters - Exterior Fabric
2 Fat Quarters - Lining Fabric
1 Fat Quarter - Top Band Fabric
1 Fat Quarter - Straps and Fabric Yo-Yo
1 Fat Quarter - Fusible Interfacing
1 button (optional)
Cutting Instructions:
Cut 2 on Fold: 15.5" x 9" - Exterior Fabric
Cut 2 on Fold: 15.5" x 9" - Lining Fabric
Cut 2 on Fold: 9" x 6.5" - Top Band Fabric
Cut 4 on Fold: 2.5" x 10" - Strap Fabric
Cut 4: 2.5" x 20" - Interfacing
Instructions:
1/2" SEAM ALLOWANCE UNLESS OTHERWISE NOTED
Cut all pieces according to cutting instructions above.
Apply fusible interfacing to the back side of all four strap pieces according to package instructions. I know interfacing can be a little confusing, but the interfacing used in the project is nothing fancy. It is fusible on one side (not both) and will add a little strength to the straps. If you prefer to add a little more body to the tote bag, you could apply interfacing to the back sides of all the pieces.
Place two of the strap pieces with their right sides together and sew down both long sides.
Turn the strap right side out and press.
Topstitch down each long side of the strap in coordinating thread. Do the same thing with the other two strap pieces.
For the main body of the bag, cut 1.5" squares out of two of the corners of the main bag pieces (pictured above). Do this on all four pieces (exterior and lining) If you would like a shorter bag but with more width then go ahead and cut a 2" - 2.5" square out of each side. Place the exterior bag pieces with their right sides together and sew down both long sides and the bottom (in between the two squares) leaving the top open and the squares open. Do the same thing with the lining fabric.
Press all seams open for the lining and the exterior main bag pieces.
Pinch the bottom squares of the bag and line up the two straight edges of the squares. Pin in place and stitch across the straight side. Do this for all four corners (two exterior and two lining).
Cut off some of the extra seam allowance to remove bulk and make sure the corners turn out nicely. Turn the exterior fabric right side out, but leave the interior fabric wrong side out.
Place the top band fabric pieces with the right sides together and sew down both short sides. Fold the top band in half (long-ways) and press.
Measure in 4.5" from each side of the bag for strap placement.
Pin the straps in place and baste stitch them to the bag.
In the next series of steps we will be layering several pieces together. Slide the top band piece over the top of the exterior of the bag, lining up the raw edges.
We left the lining part of the bag with the wrong side out. Slide the lining piece over the exterior, band and straps. You are making a sandwich with the two different bag pieces, the straps and the top band.
Sew around the top, leaving a 3"- 4" opening for turning right side out.
Turn the bag right side out by pulling the exterior fabric of the bag through the opening.
Topstitch around the top of the bag. Make sure to iron under the opening we used for turning earlier so that your topstitching will catch and close the opening during this step.
Pin the straps in place and sew them to the top band of the fabric. Do this by sewing a square around each one with an 'X' in the middle.
Hand sew an embellishment at the top of the bag. I made a fabric yo-yo with a button in the center. There are many tutorials online for fabric yo-yo's, so I'll skip that here. But you can use any trims or embellishments you would like to make your bag special.
And that's it......you're finished!
Here is what the bottom of the tote will look like. Like I said above, if you would prefer a wider base, just cut the squares out of the main bag pieces larger.
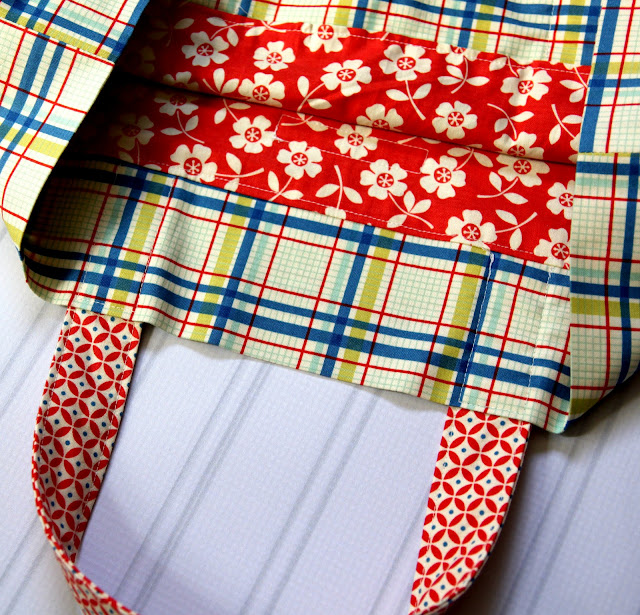
This is what the inside of your tote will look like once you are finished. Fully lined with no exposed edges....nice and pretty!
If you have your own sewing labels, then add one to the back of the tote.
Happy Sewing!


No comments:
Post a Comment