Showing posts with label Sew Basics. Show all posts

Monday, June 27, 2011

Playdate Outfit Sew Along: Day 1 - Getting Started


Welcome to the Carina Gardner "Playdate Outfit" Sew Along!  I'm so glad so many of you have decided to join in the sewing fun.  And even if you're not sewing the pattern along with the rest of us, you still might find some helpful hints and tricks when sewing with commercial printed patterns.  So, let's get started..........

The Tools:
Here are a few of the tools that I like to use when I'm sewing.  I find they make life a little easier and they can help achieve that truly professional look to your sewn garment.   I have quite a few tools in my sewing box, so I'm just going to share a few that I think will pertain to this particular pattern and garment so as to not overwhelm you.


1. Bodkin - This tool is great for threading elastic.  You can certainly use a safety pin, but this makes it even easier and it's very inexpensive.  It is found in the notions section of your sewing store. 

2. Hem Gauge - The hem gauge is probably one of my favorite sewing tools.  If you don't have one, you MUST get one.  This little guy helps you achieve perfect hemming lengths as well as helping with button placement and the centering of appliques.

3.  Seam Ripper - I have a love/hate relationship with this tool.  It's definitely a must when you are sewing, but you don't like to have to put it to much use.  This is also what I use for cutting into my button-holes.

4.  Fray Check - I use this a ton.  This prevents fraying and washes really well.  I use this on all of my button holes after they have been cut open as well as on the ends of ribbon and on the ends of all serged seams (which will not apply to you if you don't have a serger).

5.  Button-Hole Foot - If you have an older sewing machine, you may not have one of these.  But if you have a newer model, your machine probably came with this foot.  If you've never used it, get out that manual and give it a whirl.  Basically, once you know how to use it, it does all the work in creating perfect button-holes.  If your machine didn't come with one, check online and see if there is one available - it's well worth it!

6.  Sewing Scissors - These are not your every day use scissors.  These are your super-sharp, sewing-only scissors.  Keep these scissors reserved for your sewing projects, that way they will continue to stay sharp.

7.  J-Foot - This is my go-to sewing foot, the one I pretty much always have on my machine.  I like being able to see through the bottom of the foot and it just works for me.  Use whatever foot you are most comfortable with.

I also use a rotary cutter and mat for cutting my patterns, but that is something totally optional.  If you are new to sewing, you may not want to invest in something like this yet so using pins and scissors to cut your patterns will work out just fine.


Iron, iron, iron.  I can't tell you how much time I spend ironing when I'm sewing a pattern.  I probably spend just as much, if not more time ironing than I do actual sewing.  You must have a good iron and a steam iron can be found at most stores (I got mine at Target).  It doesn't have to be expensive, but you must make sure it's a good one.  Check Consumer Reports or Good Housekeeping for some of their reviews - that's how I found mine.


Another one of my favorite tools - spray starch.  This gives your garment incredibly smooth lines and works great when sewing with cotton fabrics.  I love pressing seams with starch and it truly gives a professional look.


Hand Sewing Kit: I got this plastic box at Office Depot during one of their back to school sales and I want to say it was only a penny (hard to believe anything is a penny these days).  I keep my hand-sewing supplies in this box and it is so easy to grab when I need to sew on a button or something.  All it has inside is neutral thread, a small pair of scissors and several different size hand-sewing needles, but the convenience of it is just great.


For the next several steps, I wanted to share with you the paper I use for tracing patterns.  I use your basic Freezer Paper that can be found in most local grocery stores.  This stuff is great.  It's thin enough to see through to trace your pattern, yet thick enough for your traced patterns to stand up to heavy duty use.  I know many people use pattern tracing paper, but I just find this to be more durable.

Preserving and Tracing Commercial Patterns:

When I purchase a nice, commercial paper pattern, I very rarely will ever cut into the original copy.  For $12-$16 per pattern, I want to make sure that I can use it multiple times and if I cut into one specific size then I am limiting the useful life of the pattern.

So how do I preserve my sewing patterns?  By tracing each pattern piece in the desired size that I am sewing.  I do this by using my large roll of freezer paper, pattern weights, a pencil and several rulers.


First, determine what size pattern works best for your child.  Every pattern designer uses different grading standards.  So a size 2 from one designer may be slightly different than a size 2 from another.  It's best to look at the grade rules (aka measurements) on each pattern when determining what size will be the perfect fit.  If you are sewing for a friend or grand-child then you just may have to go with standard sizing.


Once you have determined what size pattern you are using, you will want to unfold your pattern and lay it out on a large flat surface.  I layed my pattern out onto my rotary cutting mat because that was just the right size.


Next, roll out your freezer paper on top of the pattern piece you wish to trace.


I like to use my pattern weights to make sure my freezer paper doesn't move when I'm tracing my pattern.  These are just your basic washers that I had my husband pick up for me at Home Depot.  Someday I'll decorate them and make them look pretty, but for now they work just great!


When tracing the pattern, I like to use a ruler for my straight edges to achieve the perfect line.  But if you have a steady hand, then you can certainly just trace everything by hand.  Just make sure you trace very carefully because if your tracing is off, your cutting will be off and thus, your garment will not be quite right - it can definitely cause a huge domino effect.


Here is one piece of the pants pattern that I've traced onto my freezer paper.  I've removed the original pattern from underneath so I can easily cut out the pattern piece with my rotary cutter.


After you have cut out your pattern piece, you'll want to make sure you transfer all the markings and text from the original pattern.  You especially want to note the grain line and any notch marks where you may need to line things up.  I also like to include the size I've got on the traced piece so I can reference it if I decide to sew the same size again.

Determining Fabric Yardage:


Most commercial, printed patterns will provide the yardage calculations for you in the printed instructions.  Use this to determine how much fabric is needed.  Pay careful attention to whether or not a garment is lined or un-lined or whether or not there is contrast fabric used.  This will all alter the total amount of yardage needed to complete the garment.
Pattern Cutting:


Before cutting any pattern pieces, pull out the instructions and look at the cutting layout.  This will help you determine how your pattern pieces should be laid out on the fabric.  It will also help you by making the most out of your fabric so you end up with the least amount of waste.

Make sure you pay attention to what pieces might be cut "on the fold" or "not on the fold".  When you cut "on the fold" this will make your finished fabric pattern piece double the size.  The pieces needing to be cut on the fold are usually marked, but it's always good to double check your cutting layout.

**I did notice what I think might be a slight mis-print in the pattern or it could have just been unique to my copy.  There were two pattern pieces labeled "Waistband Front", but if you compare them to the cutting layout, you will realize that pattern piece "H" is actually "Waistband Back".  Again, this is another place where the cutting layout comes in handy.**


Once you have traced all your pattern pieces, it's time to cut out your pattern.  Use pattern weights or pins to hold your pattern in place.


Remember how I said it was important to pay attention to the grain-line?  Well, this is where you need to know what direction that is going in or you could end up cutting your pattern in the wrong direction.  Generally, the grain-line you are going to want to follow runs parallel to the selvage of the fabric.  The selvage is the outermost edge of the fabric.  In the picture above, it is the cream colored line running along the printed edge of the fabric. 


For the playdate outfit, I traced the pants pattern pieces at the full length, but because I wanted to use the cuff piece, I folded the bottom up to the dotted line in order to achieve the shorter length.


I always cut my patterns out with my rotary cutter because that's what works for me.  But like I said before, if you prefer to pin your pattern pieces and cut them out with scissors, go for it!


I like to mark my back pattern pieces with a safety pin.  This is just what works for me.  You could also use a water-soluble fabric marking pen and make an little "X".  I just find the safety pins easy to see so I know what piece is what - the front and back of pants can be a little confusing.


Once you have traced and cut all of your pattern pieces, you will need to store them.  I like to store a lot of my patterns in large zip-lock bags.  I place the pieces folded 2-3 times with the pattern cover and instructions all together.


Then I punch a hole in the top of the bag and slide them onto hangers.  I find I can get 3-4 patterns per hanger (depending on how many sizes I've traced).  Then these can be hung on a garment rack or in a closet for later use.


When I am designing my own patterns and need to be very careful about folds in the patterns, these pattern hooks come in handy.  You can punch a hole in each pattern piece, slide them onto the hook and hand them up without ever having to put a single fold in the pattern.  These can be purchased online from various design supply companies.

Ok, so now we've finally gotten started - woohoo! 

The goals for today are the following:
1.  Gather your tools.
2.  Trace your pattern in the size you will be making.
3.  Determine the amount of fabric you need for your garment.
4.  Cut out your pattern.
5.  Press all the fabric pattern pieces after cutting to get ready for sewing tomorrow!

I can't emphasize enough how important cutting is when it comes to using patterns.  If you don't cut properly, I can almost guarantee your garment is not going to turn out just the way you wanted.  The fit will be off, seams won't line up.  So it's important to go slowly and take the time to really do each step correctly.  Trust me, if you are going to spend a week sewing a garment, you are going to want it to turn out just right!!

Generally I like to respond to your comments via email, but since we are all sewing along together, I will be responding to everyone in the comments section so we can all see the responses.  Feel free to ask any questions, give any tips and tricks you might have, or simply just talk about what you've learned.  Anything goes..........

Thursday, May 26, 2011

The Cottage Home Little Girls Sew Along

So I've been wanting to do a "sew along" here on the blog for some time and have finally decided that it is time.  Our wonderful blog sponsor, Terri from Fairytale Frocks & Lollipops, is going to be sponsoring this sew along for us.  I was originally going to pick a pattern myself from her fabulous selection of little girls sewing patterns, but I decided I would let you all make the final decision.

I've narrowed it down to six patterns that I thought you all would enjoy sewing for your little ladies.  Surprisingly, I have never sewn from patterns from any of these companies, so I'm just as excited as you are to give one of these a try. 

Below are the six patterns to choose from (voting is in the left side bar of the blog).  Once the winning pattern is selected, Fairytale Frocks & Lollipops will make sure to order plenty of this pattern for all of us to participate.  You can order the pattern through Terri's shop and we will go from there.

Pattern #1: Oliver + S - Class Picnic Blouse and Shorts (Size 6m - 12 years)


Pattern #2:  Oliver + S - Seashore Sundress (Size 6m - 12 years)


Pattern #3: Pink Fig - Vintage Jane Peasant Top and Dress (Size 2T - 10 years)


Pattern #4: ZoZo Bug Baby - Maliya Dress (size 12m - 8/10 years)


Pattern #6: Favorite Things - Little Bow Beep Dress (size 1 - 14 years)


So those are the six pattern choices and I would be happy to sew any of those!  I will be doing a series of blog posts and we will talk about things such as how to use a paper pattern, selecting fabrics, and many other tips and tricks along the way.  Basically we will be sewing this pattern "along" with each other.  Also, you all can feel free to ask me any questions you might have as well.  If you are new to sewing this is a great opportunity to learn how to use patterns and if you are a veteran sewer this will just be great fun.  I love using sewing patterns and I think you will too!  

If you think you might be interested in participating in this sew along with us, please leave a comment below so that Fairytale Frocks & Lollipops knows about how many patterns she will need to order once the winning one is selected.  

So, are you excited?  Hmmm......wonder which pattern you all will choose?  Can't wait to see!

**The voting is in the left side-bar of the blog, underneath my picture and "welcome" blurb.  Voting in the comments will not be counted, so please make sure you vote in the poll on the side-bar of the blog. Thanks so much!**

Wednesday, February 9, 2011

Sew Basics: Make Your Own Custom Piping


I think piping is one of the sweetest, most professional details you can add to children's clothing.  It makes a some-what ordinary piece of clothing into something extraordinary.  There are many different colors and sizes of piping that you can purchase pre-made in the notions section of your local sewing store, but did you know that you can make your own?

Making your own piping is really fun, very easy, and super affordable.  I love tying a garment together with piping in a coordinated, printed fabric.  Last week in my vintage/retro "Project Run and Play" outfit, I added custom piping into the peter-pan collar and I thought I would share the how-to with you today.

Make Your Own Custom Piping

Supplies:
Bias cut fabric strips (1"-1.5" wide)
Cotton cording
Sewing machine

Directions:


First, you will need bias-cut strips of fabric.  To cut your fabric on the bias, you will need to cut it at a 45 degree angle against the grain.  Do this exactly the same way you would if you were making bias-tape.  I cut my fabric 1.5" wide and then cut it down after I make my piping based on the seam allowance I'm using for my design.  You could certainly cut it more narrow - say 3/4" - 1" if you know your seam allowance is smaller - I just like have more fabric to work with.  

Also, you don't need much fabric unless you are planning to make a lot of piping.  If you are making a large amount of piping, sew each bias strip of fabric together as you would when making bias tape.


Next you will need cotton cording.  The size of the cording is going to be up to you - it depends on how large you want your piping.  If you are inserting the piping into a children's garment, I recommend a very small cord; however, if you are making piping for the edge of a pillow, you are going to want something much larger.  This cording can be found in the notions section or the upholstery section of your sewing store.

I've also heard that you can use a worsted-weight cotton yard as cording, but I have yet to give that one a try.
Lay your cotton cording in the center of your bias strip.  Fold the bias strip in half over the cording so that both raw edges are lined up together.


Next, you need to baste your fabric around the cording.  I use a straight stitch set at 3.5 for basting.  You want to run your stitching as close to the cording as possible without actually stitching into the cording.


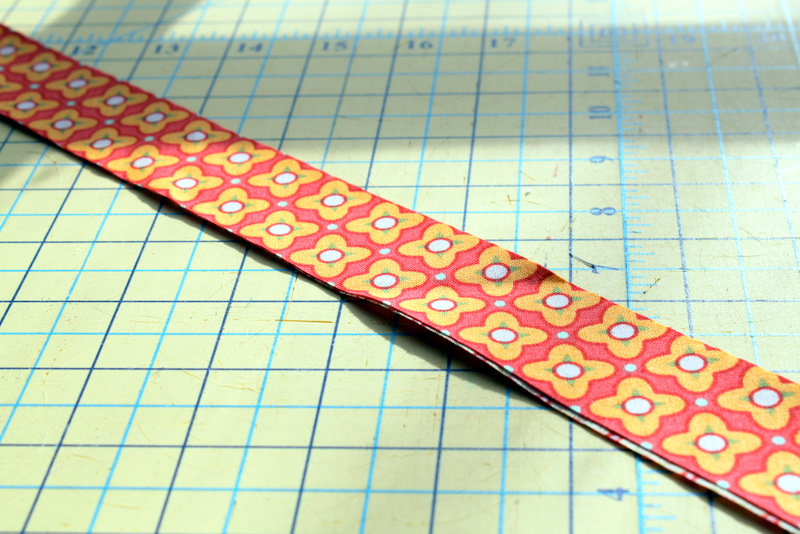
Here is what your piping looks like after you have basted it together.  Normally I would use a coordinating thread, but I wanted you to be able to see the stitching.  After this step, I like to cut the raw edge of the bias cut fabric down to the seam allowance that I am using in my design (whether it be 5/8", 1/2", or 1/4"). 

If you are making lots of piping to save for future projects, I would recommend going with a wider cut bias strip and then cutting down the raw edge based on the seam allowance for each individual project.


Once you have your beautiful custom piping, you can follow my "Piping Tutorial" to insert it into a garment.  

Click HERE to learn how to insert piping.

Sunday, October 31, 2010

Sew Basics: Bias Tape (part 1)


I am so inspired by all of you that are new to sewing, getting back into sewing, or are thinking about buying a sewing machine to start sewing.  I love all the emails you have sent me and conversations we have had over on facebook.  I haven't been the most consistent with my "Sew Basics" tutorials, but I'm going to try to put more of these together in hopes that you all will get as hooked on sewing as I am.

As most of you know, I am a self-taught sewer (well, mostly).  I've had a few lessons from my Grandma and grew up with my Mom sewing (though I never showed much interest).  Bias tape was very confusing to me when I first started sewing garments.  I couldn't figure out which side was supposed to go where.  If any of you are like me, I hope this tutorial will help ease the confusion. 

Here's the plan for Sew Basics: Bias Tape

Part 1: Sewing bias tape to a garment
Part 2: Making your own bias tape from fabric

After part two, I will show you how to take your homemade bias tape and turn it into corded piping.

Let's get started........

Bias tape is a narrow piece of fabric that is cut on the bias (45 degree angle) which allows it to be stretchier and more fluid than fabric cut straight across.  Because of it's stretchiness, bias tape works great for encasing raw curved edges and giving items a finished look.


Bias tape can be purchased in the notions section of your local fabric store.  You can usually find it near the zippers and ric-rac.  These days, most bias tape comes in basic, solid colors; however, you can find vintage bias tape (see above picture) in all sorts of different fun patterns.  To customize your own bias tape, you will need to make your own (we will discuss that in part 2). 

There are two different types of bias tape that is made in varying widths - single-fold and double-fold.

Single-fold bias tape has two sides folded inwards (one fold is slightly larger than the other) and it is not folded down the center.  Double-fold bias tape is basically single-fold bias tape, but folded in half again lengthwise.  Double-fold will encase an entire raw edge with bias on either side of the raw edge.  Single-fold will allow you to fold over a raw edge to the inside of a garment to finish the edge, but generally you will not see any bias tape on the exterior of the garment.  I like to use double-fold for most things.

Here is an example of how to sew double-fold bias tape to encase an armhole on a vintage pillow case dress:


Open up your double-fold bias tape.  If you look very closely you will see that one side has a larger fold than the other.  This is a very important detail to notice before you sew on your bias tape.


Open up the fold on the smaller side. When getting ready to encase an arm hole, you want to line up the raw edge of the garment with the raw edge of the smaller fold of the bias tape.  Pin this in place on the right-side of the garment.  So as you can see above, you will need to unfold the double-fold tape quite a bit for this step to work.  The larger fold will remain folded over.


Stitch in the fold along the raw edge of both the bias tape and the garment.  Sew on the right-side of the garment.


Here (picture above) is what your bias tape will look like once you have stitched in the fold towards along the side with the smaller fold.


Next fold your bias tape over to the other side (wrong-side of the garment).  If you notice in the picture above, the bias tape on the underside is ever so slightly wider than the top.  This is exactly what you want.


Now stitch as close to the edge of the bias tape as possible on the top side (smaller fold).  Stitching on this side will ensure that you will catch the larger fold (on the other side) and have perfect looking bias tape every time!  Important to note:  You stitched your original line of stitching on the right-side of the garment and you are doing your second set of stitching on the same side (right-side) of the garment.


Here is what your bias tape will look like once it is sewn into place.

I used the double-fold bias tape technique on this vintage pillowcase dress arm hole.  Using this method, I have no trouble sewing perfect bias tape every time!


You can use bias tape to encase any raw edge of a sewing project or simply use it to add a pop of color and style.  Try it on the bottom edge of a skirt, the bottom of a dish towel for some added decorative detail, or on the edge of a pocket. 

Single-fold bias tape works very similarly to double-fold.  The only difference is that when you fold over your bias tape to the wrong-side of the garment there will be nothing left on top (you won't see the bias tape from the right-side of the garment).  Instead you will just see a line of stitching on the fabric where you have sewn your single-fold bias tape to the wrong-side of the garment.  Personally I find double-fold bias tape to be easier and have a cleaner, more finished look, but use whatever your pattern or design calls for.

Once you master sewing bias tape, you will feel like you have come along way as a beginning sewer.  Honestly, I used to dread sewing bias tape, but now it is a piece of cake!  Don't let bias tape scare you, it can be a lot of fun and I will show you how to add your own special flare to projects in Sew Basics: Bias Tape (part 2).

Cottage Mama's Note:  If you have any questions, please email me at thecottagemama@gmail.com and I am happy to help.  We have lots of fun talking "sewing" over on The Cottage Mama facebook page, so come on over and join in the fun!