Showing posts with label Tutorials. Show all posts

Thursday, November 15, 2012

DIY Cabochon Jewelry


As much as I love sewing, sometimes I get the urge to do something a little different. I've been planning some of my DIY Christmas gifts this year and I thought it would be really fun to make some pretty jewelry for friends and family.

Flower cabochons have always had sort of a vintage feel to me and I find them to be really beautiful. You can buy them from many different sources online (here are a ton sold on Etsy) and they are really reasonably priced. Basically they are just molded resin and are really lightweight and easy to work with when crafting. You can attach them to just about anything, but this year I decided to make rings, earrings and hair pins.

If you get these going in assembly line style, you will have plenty of jewelry in no time!
DIY Cabochon Jewelry
by Lindsay Wilkes from The Cottage Mama

Supplies:
Flower cabochons (found here)
Blank bobby pins, rings or earrings
E6000 or other industrial strength glue

Instructions:

Gather up all of your supplies for this project.


Like I said above, you can purchase some really gorgeous cabochons via Etsy.com. I ordered all different shapes and sizes so I would have a wide variety of different styles and colors.


As far as the blanks go for bobby pins, rings or earrings, I purchased the earrings and bobby pins online and found the rings at our local Joann super-store. You will have more of a selection if you order online, but you should be able to find all of these at your local craft store. Our lovely blog sponsor, Crafter's Vision carries some different blanks as well.

I bought adjustable rings because I'm not sure of everyone's ring size. Just make sure the blank portion of the ring is smaller than your cabochon (or at least the same size). The square rings (that came in this variety pack) didn't really work for this project since the blank was too big.


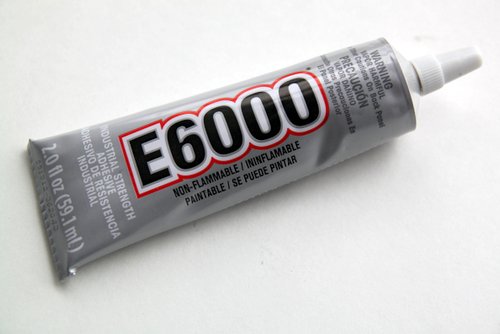
E6000 is a great glue to have in your stash of craft supplies. It's super strong and dries clear. You can find this at your local craft supply store. If for some reason you can't find this, then just look for another industrial strength glue. Jewelry gets a lot of wear and tear, so you don't want it falling apart.


So this project is really simple. Take a dab of glue and place it onto the blank jewelry, then press your cabochon on top. Leave them upside down to dry for at least 24 hours.


For the smaller pieces, like the earrings, I just put a dab of glue on some paper and dipped the top of the blank part of the earrings and pressed them to the cabochons.


These make great gifts for girlfriends, teenage girls and teachers.

Package these pretties up and you are good to go! 

Tuesday, October 23, 2012

Easy Eye Glass {or Rotary Cutter} Case Tutorial


Today we have a special guest, my mom (aka Grandma Jane) with another one of her quick and easy quilting tutorials. Take it away Mom........

I would really encourage any new quilter to find some sort of quilting group to join. It is a great way to learn from and be inspired by more experienced quilters, share quilting projects, get advice and support, and most of all, to make new friends who are as crazy as you are about quilting! There are a lot of online quilting resources out there (after all, you are reading this blog) but a group that you can physically be part of is a gift if you can find one. Most areas have quilting guilds that you can join, quilt shops may have classes and open sew times, or just gather a few of your friends together to sew up a storm.


Early morning Camp Allen and a porch just made for quiet reflection….

I returned recently from a weekend quilting retreat with a group of wonderful women! Our weekend retreat at Camp Allen north of Houston was filled with lots of sewing, sharing good food, plenty of laughter, personal reflection, prayer and fellowship. There were twenty women of all ages ranging from a 16-year old granddaughter of one of the members to a great-grandmother with 25 grandchildren and everything in between. I can’t tell you all the “details” of our weekend because what happens at Camp Allen….stays at Camp Allen… but I will say just say lots of new quilting tattoos went home. Shhhh….

I started quilting about two years ago when I was invited by my friend, Diane, to join the church quilt ministry group. The group meets several times a week with evening and daytime meetings to accommodate schedules for everyone with the focus on ministry projects for the church. These women make quilts for each baby dedicated at church, prayer blankets for hospitalized church members and recently sent 58 (yes, I said 58!) jelly roll strip quilts to missionaries in Guatemala. Margaret and Barbara, the leaders of the group, are an inspiration in many ways. Not only do they have awesome quilting skills but they are women of incredible strength and faith.

The service project that everyone worked on during our weekend, in addition to their own sewing, was a cute little glass case. The goal is to make 90 of these cases to be included in goodie bags for the breast cancer survivors being honored at a gala in March at a local hospital. October is National Breast Cancer Awareness Month so how fitting to be working on this project at our retreat. This is a really easy project that would be a great gift idea/stocking stuffer for Christmas, too. If you don’t need it for glasses—it makes a perfect holder for a rotary cutter for your favorite quilter!

This project is inspired by the Quilts and More Magazine project in the Summer 2012 issue. 

Easy Eye Glass {or Rotary Cutter} Case Tutorial
by Grandma Jane for The Cottage Mama


SUPPLIES:
(1) 9 inch square of batting
(1) 7 ½ inch square of outer fabric
(1) 7 ½ inch square of lining fabric—flannel works well
(1) 1 ¾ x 9 inch strip for strap

INSTRUCTIONS:


1. Center outer fabric on batting and quilt as desired. I used a cross-hatch design that I marked with a fabric pen prior to sewing. Trim batting even with fabric.


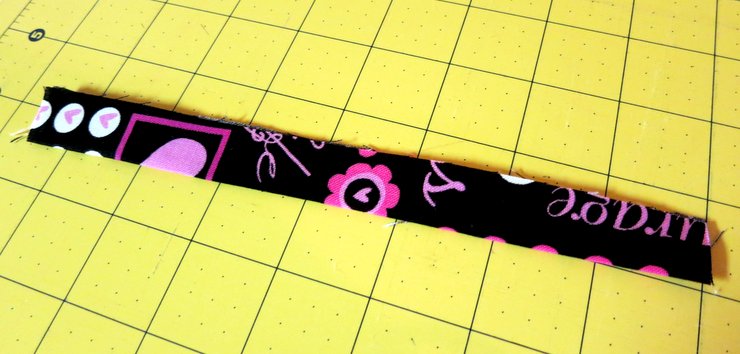
2. Fold strap piece in half lengthwise and press. Unfold and fold in long edges to meet in the middle. Refold in half along pressed edge and edge-stitch.


3. Fold stitched strap in half cross wise. Pin to top edge of outer fabric ½ inch from left edge. Baste. If your fabric is directional—make sure to have it going the direction you want at this point.


4. Place lining fabric on top—right sides together and stitch ¼ inch seam across top, catching in strap.


5. Press open with seam allowance towards lining and edge stitch lining.


6. Fold edges together lengthwise and stitch a ¼ seam around outer edge, leaving short-end of lining open. Clip corners.


7. Turn case right side out. Turn in short edges of lining ¼ inch and press. Hand stitch or machine sew short end of lining. 8. Insert lining into case and press again! Easy!!!


Thanks so much for joining us today, Mom! It always so fun to have you here.  I definitely think these will be on my easy gift giving project list for this year!

Monday, October 1, 2012

Seersucker Double Layer Twirl Skirt Tutorial

This was a guest post that I did some time ago over at Simple Simon for the "Skirting the Issue" series. Consider using this tutorial and making these skirts out of corduroy for fall or use your favorite designer quilting cotton in fun prints for a more bold statement. No matter what fabric you choose, your own little lady or the little foster care girl you are sewing for will LOVE to twirl in these skirts. 


My name is Lindsay Wilkes from The Cottage Mama and I'm so excited to be here as part of the 'Skirting the Issue' series.  What an amazing cause and I'm thrilled to be able to provide some handmade skirts for some very special little ladies.  I make clothing for my children all the time and the idea of a child never having something special made just for them, breaks my heart.  Every little one deserves to feel special, pretty, girly and loved and it is the least I can do to provide some skirts to hopefully bring those feelings into some little girls hearts.

In thinking about what kind of skirt I wanted to make, I was considering several things.  I definitely wanted these skirts to wash well........meaning no need to press.  I wanted them to be light and summery with a bit of twirl factor, so I decided on making some Seersucker Double Layer Twirl Skirts.  Want to make some yourself?  Here's the how-to........

Seersucker Double Layer Twirl Skirt
SIZE 12 MONTH - 10 YEARS
by Lindsay Wilkes from The Cottage Mama for Skirting the Issue

Materials:
Two coordinating fabrics (I chose seersucker)
1/2" or 3/4" elastic for waistband
Trim (optional)
Basic Sewing Supplies

I am providing you with all the measurements you need in order to make a double layer twirl skirt.  These measurements are assuming you are NOT using a serged hem, they are for a regular, traditional 1" hem.  If you would like to do a rolled hem with your serger (as I did), then please subtract 1" from the length of each measurement.

Double Layer Twirl Skirt Cutting Instructions:

**All skirt measurements are meant to be cut on the fold**

12 Month 
Top Layer – 10” x 18” 
Bottom Layer - 12” x 18”
Elastic – 18” 

18 Month 
Top Layer - 10.5” x 19” 
Bottom Layer – 12.5” x 19” 
Elastic – 18” 

Size 2T 
Top Layer – 11.5” x 20” 
Bottom Layer – 13.5” x 20” 
Elastic – 19” 

Size 3T 
Top Layer – 12.5” x 20” 
Bottom Layer – 14.5” x 20” 
Elastic – 19” 

Size 4T 
Top Layer – 13.5” x 21” 
Bottom Layer – 15.5” x 21” 
Elastic – 20” 

Size 5 
Top Layer – 14.5” x 21” 
Bottom Layer – 16.5” x 21” 
Elastic – 21” 

Size 6 
Top Layer – 15.5” x 21” 
Bottom Layer – 17.5” x 21” 
Elastic – 21” 

Size 7/8 
Top Layer – 16.5” x 22” 
Bottom Layer – 18.5” x 22” 
Elastic – 22” 

Size 9/10 
Top Layer – 17.5” x 22” 
Bottom Layer – 19.5” x 22” 
Elastic – 23”

Instructions:


Cut your two layers (following cutting dimensions above).


Sew each of the layers together at the side seam (wrong sides together), meaning sew together on the short sides.  This will form each skirt layer.  Hem the bottom of each layer by folding the bottom raw edge up towards the wrong side of the fabric a 1/2" and then another 1/2" and sew in place.

Place the longer skirt inside the shorter skirt and baste stitch or serge the top of the skirts together.  You can skip this step but it makes then next step easier.


Fold over the top of the skirt 1" towards the wrong side of the fabric.  Sew in place, leaving a 2" opening.


Cut your elastic.  If you don't have a bodkin, I highly recommend one.......they make threading elastic so much easier.  But if you don't have one, just attach a safety pin to the end and that will work just fine.


Thread the elastic through the top of the waistband.


Overlap the elastic by 1" and sew in place with a zig-zag stitch to secure.


Close the opening in the top of the skirt.


I chose to do a rolled hem using my serger because I like the way it looks on seersucker.  I know most home sewers do not have a serger, so the instructions above are for a NON-serged hem.  If you would like to do a serged hem, then reduce the length in the cutting instructions by 1" for each layer.


Add any trim you would like around the bottom edge of the skirt.  I used some of my favorites and this bumble bee one always makes me happy.


Make sure each one of your skirts is clearly labeled with the size.  You don't need to use woven labels like I have here, but just a note attached to the skirt will do just fine.


I also hand sewed a little bow at the tops of some of the skirts for an added special touch.


Here are some of my skirts ready to be sent off to some very special little girls.  I had such a fun time sewing these this past weekend.  The whole time I was just imagining these little girls receiving one of these skirts and knowing that someone had care enough about them to take the time to make them something.  I cannot even imagine being a foster care child, but I hope that this little gesture will at least brighten their day to know that someone out there is thinking of them, praying for them and wishing they could send each one of them a big giant hug.


Sometimes it's important to take time out of our busy lives and do something for others.  This project was a true blessing for me and I thank you for causing me to take a little time to stop and smell the roses.

I encourage you to whip up several of these twirl skirts.  I promise they don't take much time at all and not only will it bring joy into the lives of some little girls, it will bring joy into your heart as well!

Here are some examples of these skirts made from designer quilting cotton:


Have a great week!