In case you missed my guest post on Kojo Designs "Gifts for Guys" series, here is my tutorial for a men's toiletry kit (aka Dopp Kit or Shaving Kit).
I find guys to be the hardest people to buy for when it comes to gifts. I made a commitment this year to only give handmade gifts so coming up with gifts for guys has been taken to a whole new level.
My husband has had his Dopp Kit since he was 13 years old, yes that's right, 13!!! It is definitely in a sad state right now, so I decided it was time to make him a new one. A Dopp kit is also known as a shaving kit, a man's toiletry kit..........but I like the sound of "Dopp".......sounds pretty manly, right? And that's what my Dad always called it.
Boxy Dopp Kit Tutorial
Supplies:
4 pieces of fabric cut 13" x 14" (I used wool suiting material)
4 pieces light-weight interfacing cut 13" x 14"
1 piece coordinating fabric cut 5" x 6" for handle or pocket
1 14" zipper
Thread
Hand-sewing needle
Sewing machine
Iron
Ironing board
Fold the 5" x 6" piece of coordinating fabric in half length-wise. This will be used for the handle on the kit.
Stitch around the handle fabric, but leave a small opening on the straight, long edge. Clip the corners.
Turn handle fabric right-side out and hand-sew the opening closed. Press with your iron.
Now to insert the zipper. Make a "zipper sandwich". Place the right-sides of two of the fabric pieces together and place the zipper in between. Line up the raw edges of the fabric and the raw edge of the zipper. Pin in place.
Attach your zipper foot to your sewing machine for the following step.
Stitch zipper in between the two layers of fabric.
Turn fabric pieces right-side out and press seams open. Now do the exact same thing with the other two pieces of fabric on the other side of the zipper.
Press all seams for exterior fabric and lining.
Place the fabric handle piece half-way down one of the exterior fabric pieces. This should be in the very middle of the rectangle. Stitch in place on both short sides. Make sure to only stitch this to the exterior piece of fabric. If you would prefer this to be a pocket, instead of a handle, stitch on both short sides and one long side.
Turn your fabric now so that the lining is on the outside. Line up the bottom four fabric pieces and stitch all the way along the bottom. 5/8" seam allowance.
After you have stitched the bottom closed, open up your zipper part way.
Now fold your fabric out so that the zipper is running down the middle and stitch both side seams closed. 5/8" seam allowance.
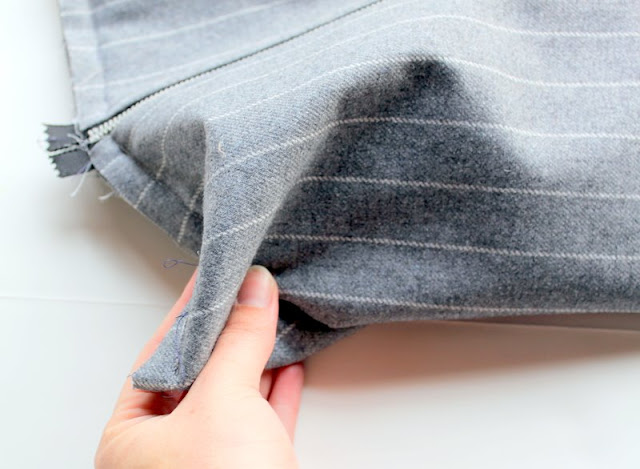
Now pinch your corners. This is going to give your bag its height. I originally pinched my corners 4", but then went back and pinched them to 7". I would recommend 7" for the sizing I have listed.
Stitch the corners in place by using a straight-stitch.
Cut off the excess material from each corner. I used my serger to finish the edge since the wool suiting tends to fray. Use a zig-zag stitch, if you prefer, or just cut away with pinking shears. In retrospect, I probably would have serged all my edges before starting this project. Just something to think about if you plan to use wool suiting.
And there you have it - A Boxy Dopp Kit for your man!
This Dopp kit could be made in many different fabrics. If you decide to use a more basic cotton, then I would recommend using a heavier interfacing to make sure the bag holds its shape well.


No comments:
Post a Comment